CS285 강의를 수강하면서 Youtube 영어 자막에 굉장히 불편함을 느껴, 직접 영한 자막을 달아보기로 했다.
그 전에도 OpenAI 의 Whisper 로 음성을 쉽게 추출할 수 있는 걸 알았고 생각만 하고 있다가 사용해볼만 한 적절한 대상을 찾은 것이었다.
YoutubePlaylistDownloader
우선 플레이리스트에 있는 영상을 모두 받아줄 프로그램이 필요했다.
그래서 shaked6540/YoutubePlaylistDownloader를 사용하였다.

윈도우에서는 관리자 권한으로 실행해주어야 하고, .NET 0.10.0 설치가 되어있어야 한다.
faster-whisper 로 음성 추출하기
faster-whisper 는 Whisper 모델을 가속화한 모델로, 훨씬 빠른 속도로 Transcription 이 가능하다. 내 PC의 경우도 GTX 1660S 였음에도 괜찮은 추출 속도를 보여주었다.
Github LINK
모델 사용에 앞서 GPU 사용을 위해 CUDA, cuDNN 을 설치해주었다.
각 GPU 마다 맞는 CUDA 버전이 다르다고 해서 몇몇 글을 참고하였다.
CUDA, cuDNN Installation
References
NVIDIA 공식 문서는 항상 뒤죽박죽되어 있는 느낌이지만 아래 링크대로 차근차근 따라갔다.
CUDA Toolkit 은 11.4.4 버전으로 설치하였다. LINK
>nvcc -V
nvcc: NVIDIA (R) Cuda compiler driver
Copyright (c) 2005-2021 NVIDIA Corporation
Built on Mon_Oct_11_22:11:21_Pacific_Daylight_Time_2021
Cuda compilation tools, release 11.4, V11.4.152
Build cuda_11.4.r11.4/compiler.30521435_0
Windows 에서 deviceQuery 로 확인하려면 해당 폴더에 있는 비쥬얼 스튜디어 .sln 파일을 실행해서 빌드해주면 된다.
    디렉터리: C:\ProgramData\NVIDIA Corporation\CUDA Samples\v11.4


Mode                 LastWriteTime         Length Name
----                 -------------         ------ ----
d-----      2024-01-11   오전 2:15                0_Simple
d-----      2024-01-11   오전 2:15                1_Utilities
d-----      2024-01-11   오전 2:15                2_Graphics
d-----      2024-01-11   오전 2:15                3_Imaging
d-----      2024-01-11   오전 2:15                4_Finance
d-----      2024-01-11   오전 2:15                5_Simulations
d-----      2024-01-11   오전 2:15                6_Advanced
d-----      2024-01-11   오전 2:15                7_CUDALibraries
d-----      2024-01-11   오전 2:15                bin
d-----      2024-01-11   오전 2:15                common
-a----      2021-08-16   오후 1:14         108936 Samples_vs2017.sln
-a----      2021-08-16   오후 1:14         108944 Samples_vs2019.sln
버전에 맞게 나는 ./Samples_vs2019.sln 을 실행하였다. 빌드를 해주면 bin\win64\Debug 위치에 실행파일이 생긴다.
C:\ProgramData\NVIDIA Corporation\CUDA Samples\v11.4\bin\win64\Debug\deviceQuery.exe Starting...

 CUDA Device Query (Runtime API) version (CUDART static linking)

Detected 1 CUDA Capable device(s)

Device 0: "NVIDIA GeForce GTX 1660 SUPER"
  CUDA Driver Version / Runtime Version          12.3 / 11.4
  CUDA Capability Major/Minor version number:    7.5
  Total amount of global memory:                 6144 MBytes (6442123264 bytes)
  (022) Multiprocessors, (064) CUDA Cores/MP:    1408 CUDA Cores
  GPU Max Clock rate:                            1815 MHz (1.81 GHz)
  Memory Clock rate:                             7001 Mhz
  Memory Bus Width:                              192-bit
  L2 Cache Size:                                 1572864 bytes
  Maximum Texture Dimension Size (x,y,z)         1D=(131072), 2D=(131072, 65536), 3D=(16384, 16384, 16384)
  Maximum Layered 1D Texture Size, (num) layers  1D=(32768), 2048 layers
  Maximum Layered 2D Texture Size, (num) layers  2D=(32768, 32768), 2048 layers
  Total amount of constant memory:               65536 bytes
  Total amount of shared memory per block:       49152 bytes
  Total shared memory per multiprocessor:        65536 bytes
  Total number of registers available per block: 65536
  Warp size:                                     32
  Maximum number of threads per multiprocessor:  1024
  Maximum number of threads per block:           1024
  Max dimension size of a thread block (x,y,z): (1024, 1024, 64)
  Max dimension size of a grid size    (x,y,z): (2147483647, 65535, 65535)
  Maximum memory pitch:                          2147483647 bytes
  Texture alignment:                             512 bytes
  Concurrent copy and kernel execution:          Yes with 6 copy engine(s)
  Run time limit on kernels:                     Yes
  Integrated GPU sharing Host Memory:            No
  Support host page-locked memory mapping:       Yes
  Alignment requirement for Surfaces:            Yes
  Device has ECC support:                        Disabled
  CUDA Device Driver Mode (TCC or WDDM):         WDDM (Windows Display Driver Model)
  Device supports Unified Addressing (UVA):      Yes
  Device supports Managed Memory:                Yes
  Device supports Compute Preemption:            Yes
  Supports Cooperative Kernel Launch:            Yes
  Supports MultiDevice Co-op Kernel Launch:      No
  Device PCI Domain ID / Bus ID / location ID:   0 / 1 / 0
  Compute Mode:
     < Default (multiple host threads can use ::cudaSetDevice() with device simultaneously) >

deviceQuery, CUDA Driver = CUDART, CUDA Driver Version = 12.3, CUDA Runtime Version = 11.4, NumDevs = 1
Result = PASS
cuDNN 설치는 아래 링크대로 따라갔다.
NVIDIA Developer Program 에 등록하고 OS 와 CUDA 버전에 맞는 zip 파일을 다운로드 하였다.
여기에 있는 bin, include, lib 폴더를 아까의 CUDA 설치된 위치에 복사 붙여넣기 해준다.
faster-whisper 사용하기
이제 faster-whisper 를 이용해 다운로드한 유튜브 영상들의 음성을 추출하고 이를 SRT 파일로 만들어보자.
설치는 간단하게 pip 로 할 수 있다.
pip install faster-whisper그리고 공식 문서 링크에 예시가 잘 나와있어서 따라하기만 하면 되었다.
나는 가지고 있는 GPU의 VRAM에 맞게 고르라고 하여서 medium 모델로 돌렸다. 모델에 대한 정보는 여기에 나와있다.
import os, math
from faster_whisper import WhisperModel
import logging
from tqdm import tqdm
import time

def to_srt_timecode(seconds):
		hours, remainder = divmod(seconds, 3600)
		minutes, seconds = divmod(remainder, 60)
		milliseconds = math.floor((seconds % 1) * 1000)
		output = f"{int(hours):02}:{int(minutes):02}:{int(seconds):02},{milliseconds:03}"
		return output

# Initialize Whisper Model
model_size = "medium" # or "large-v3"
model = WhisperModel(model_size, device="cuda", compute_type="float16")

# Directory containing your CS285 videos
video_directory = "./videos/CS285"
video_files = [f for f in os.listdir(video_directory) if f.endswith('.mkv')]
srt_file_directory = "./videos/CS285/SRT"

for video_file in video_files:
		video_path = os.path.join(video_directory, video_file)
		segments, info = model.transcribe(video_path, beam_size=5)

		srt_file_name = os.path.splitext(video_file)[0] + ".srt"
		srt_file_path = os.path.join(srt_file_directory, srt_file_name)

		# Write to SRT file
		timestamps = 0.0
		with open(srt_file_path, "w") as file:
				with tqdm(total = info.duration, unit = " audio seconds") as pbar:
					for i, segment in enumerate(segments):
							start_time = to_srt_timecode(segment.start)
							end_time = to_srt_timecode(segment.end)
							file.write(f"{i + 1}\n")
							file.write(f"{start_time} --> {end_time}\n")
							file.write(segment.text.lstrip() + "\n\n")
							pbar.update(segment.end - timestamps)
							timestamps = segment.end
					if timestamps < info.duration:
						pbar.update(info.duration - timestamps)
실제 코드에서는 폴더 안에 있는 모든 영상을 알아서 추출하고 싶어서 약간의 수정을 더 하였다. 그리고 print() 문이나 tqdm 이 없으면 각 파일마다 진행도를 알기 어려워서 터미널 출력도 추가하였다.
DeepL API 로 SRT 파일 번역하기
만들어진 SRT 파일은 다양한 방법으로 번역할 수 있다. ChatGPT 로 번역해도 되고, API로 해도 되고 Google Translation API 도 있다.
그 중 DeepL 을 직접 잘쓰고 있기도 하고, 성능이 제일 좋은 것 같다는 이야기도 많았어서 DeepL API 로 번역해보기로 하였다.
DeepL API 는 계정을 가입하고 카드 등록만 해도 Free API 가 주어진다. 한 달에 500,000 자 제한이 있어 많이 번역은 어렵지만 사용해 볼 만 하다. LINK
그리고 이걸 SRT 번역에 손쉽게 사용하게 도와주는 레포를 찾아서 이를 활용하였다.
Github LINK
마찬가지로 pip 로 손쉽게 설치하고, API 가 없어도 여러 번 번역기를 호출하면서 번역을 할 수도 있다. 이번 경우에도 제한을 다 사용해서 제공하는 다른 번역기도 사용하였다. (각각의 차이는 정확히는 모르겠다.)
import os
import glob

from srtranslator import SrtFile
from srtranslator.translators.deepl_api import DeeplApi
from srtranslator.translators.deepl_scrap import DeeplTranslator
from srtranslator.translators.selenium_utils import create_proxy, create_driver

# DEEPL_API_KEY = os.getenv("DEEPL_API_KEY")
# if DEEPL_API_KEY is None:
# 	print("No API key found. Please set the DEEPL_API_KEY using 'export' or 'set'")
# 	exit(1)

folder = "./videos/CS285/SRT"
for filepath in glob.glob(os.path.join(folder, "*.srt")):
    # translator = DeeplApi(DEEPL_API_KEY)
    translator = DeeplTranslator()

    srt = SrtFile(filepath)
    srt.translate(translator, "en", "ko")
    srt.wrap_lines()

    new_filename = "KOR_" + os.path.basename(filepath)
    new_filepath = os.path.join(folder, new_filename)
    srt.save(new_filepath)

    translator.quit()
    print(f"Translated and saved: {new_filepath}")
DeepL Python API 공식 문서도 굉장히 잘되어 있어서 직접 구현하는 것도 크게 어렵진 않을 것 같다. LINK
다른 SRT 번역기들
최근에 GPT Store 가 생기면서 각자의 GPTs 를 만들어서 공유하고 있다. 거기에 subtitle 로 검색해서 나온 몇 가지를 사용해보았는데, 대부분 python 스크립트로 연동해서 만들어진 것 같다.
하지만 한국어로 번역을 시키면 모두 처리 도중에 에러가 나타났다.
직접 DeepL, 파파고나 구글 번역기에서 나눠서 번역하는 것도 글자 수 제한때문에 쉽지 않고, DeepL API 제한수가 끝나면 더이상 양질의 번역이 어려운 것도 아쉬움이 있다.
subtitletranslator.com 에서 여러 개의 파일을 한번에 번역하고 다운로드 할 수 있게 해준다. 어떻게 이렇게 빠르게 가능한지는 잘 모르겠으나, 번역 상태를 보았을 때 꽤 괜찮았다.
DeepL
55
00:04:37,759 --> 00:04:42,959
훨씬 더 편리해집니다. 의사 결정 및 제어에서도 마찬가지입니다.

56
00:04:42,959 --> 00:04:48,240
정책을 확률 분포로 훈련하는 것이 훨씬 더 편리합니다.

57
00:04:48,240 --> 00:04:55,040
훨씬 더 편리합니다. 이제 소개해야 할 용어가 하나 더 있습니다,

58
00:04:55,040 --> 00:04:59,680
이제 순차적 의사 결정의 몇 가지 특징에 대해 알아보겠습니다,

59
00:04:59,680 --> 00:05:05,680
바로 상태라는 개념입니다. 상태는 문자 S와 기호

60
00:05:05,680 --> 00:05:12,079
첨자 T로 표시되며, 상태는 일반적으로 관찰과는 별개의 개념입니다. 이를 이해하려면
subtitletranslator.com
55
00:04:37,759 --> 00:04:42,959
훨씬 더 편리해졌습니다. 의사 결정과 통제도 마찬가지입니다.

56
00:04:42,959 --> 00:04:48,240
확률 분포로서의 정책은 결국에는 훨씬 더 편리합니다.

57
00:04:48,240 --> 00:04:55,040
우리는 단 하나의 최선의 행동만을 원합니다. 이제 우리가 소개해야 할 용어가 하나 더 있습니다.

58
00:04:55,040 --> 00:04:59,680
여기서는 순차적 의사결정의 몇 가지 특이한 점에 대해 알아보겠습니다.

59
00:04:59,680 --> 00:05:05,680
국가라는 개념이다. 상태는 문자 S로 표시됩니다.

60
00:05:05,680 --> 00:05:12,079
첨자 T이며 상태는 일반적으로 관찰과 별개입니다. 이것을 이해하다
결과물
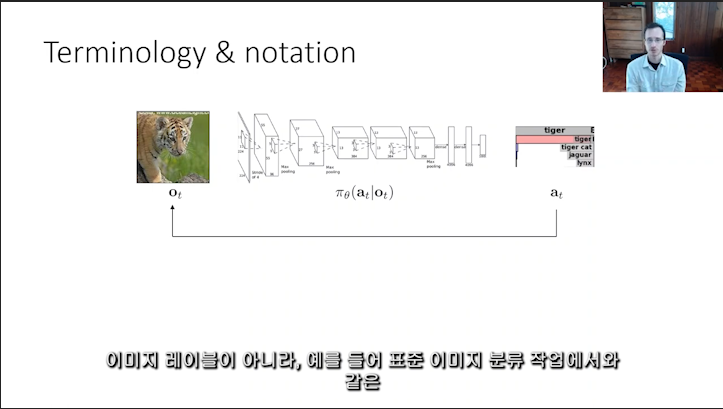
Adobe Premiere Pro 로 자막을 넣어준 모습. 수학 notation 이나 용어들도 직접 번역되거나 (e.g. : 파이, policy : 정책) 내용이 길면 줄바꿈이 되어서 세 줄로 나오는 등 아쉬움도 있지만 전반적으로 잘 되었다.